Sowing seeds and transplanting seedlings is one of those gardening basics that make all the difference in how plants thrive. I’ve watched the magic happen, from a tiny seed growing into a lush vegetable bed, but getting the basics right is pretty important. Whether you’re sowing carrots straight into the ground or starting tomatoes on a windowsill, these core planting tips give you a sturdy foundation. Here’s a simple guide so you can skip the guessing game and actually enjoy seeing your plants grow.
Why Knowing Planting Basics Matters
Getting the basics of planting seeds and transplanting right saves effort and money, and it means healthier plants. If you handle seeds and seedlings properly from the start, you’ll have fewer leggy stems, less trouble with damping off (that sudden mystery wilt!), and way better harvests. I’ve learned that taking the time to follow a planting guide isn’t just about sticking to the rules, but creating a setup where your plants stand the best chance of showing off.
Having a solid understanding of these planting basics is helpful for everyone, from a first-time backyard gardener to someone planning their next raised bed. Whether you want to grow flowers or your own lettuce, knowing the steps takes a lot of stress and confusion out of the process and lets you have more fun in the garden.
The Basics of Sowing Seeds: Step by Step for Beginners
Sowing seeds might seem simple, but some proven seed sowing techniques can make everything much smoother and more rewarding. Here’s how I plant seeds at home, for veggies and flowers:
- Check Seed Viability: Use fresh seeds if possible. If you’ve got older seeds, pop a few in a moist paper towel in a baggie for a few days to check for sprouting. Only viable seeds are worth your time.
- Choose the Right Medium: Pick a sterile, fine seedstarting mix. Don’t use garden soil for starting seeds indoors—it often brings pests or fungi.
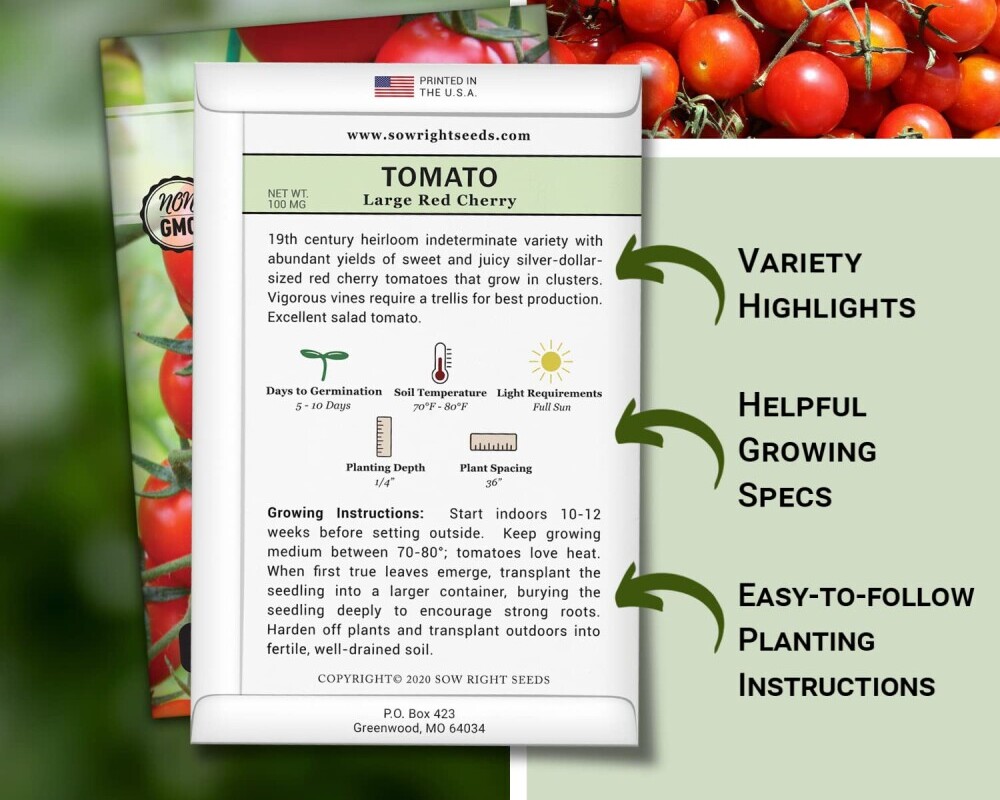
- Figure Out Germination Needs: Some seeds need extra help. If your seed packet mentions “scarification” or “stratification,” that’s all about breaking dormancy. For hard seeds (like sweet peas), gently nick the shell or soak them overnight. Others, like certain perennials, need a few weeks in the fridge (stratification) before sowing.
- Sow at the Right Depth: A good rule is two times the width of the seed. But some seeds, like lettuce and snapdragons, need light, so I leave those right on top of the soil rather than covering.
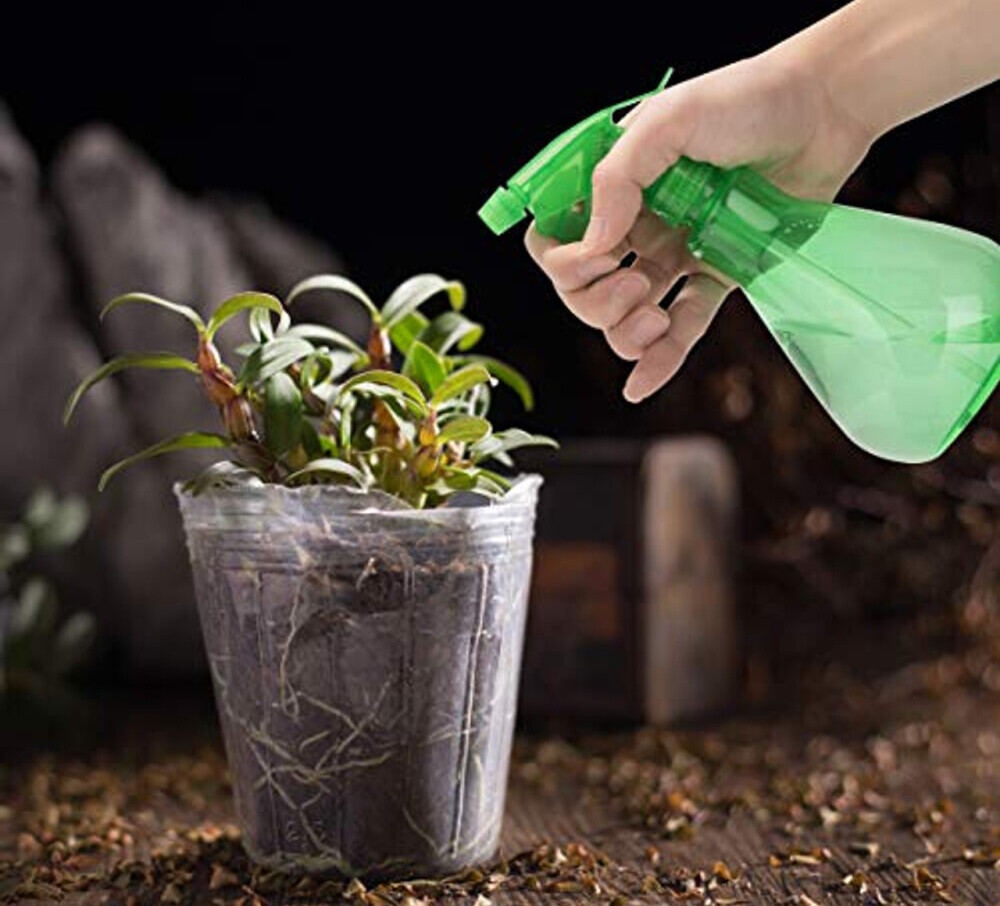
- Water Gently: Use a spray bottle or mister to avoid washing away seeds. Soil should be moist, not soggy—imagine a wrung-out sponge.
- Keep Consistent Warmth: Most seeds sprout best at 65–75°F (18–24°C). Heat mats are super useful for peppers or tomatoes. Don’t forget about light—a lot of seeds need 12–16 hours of light daily.
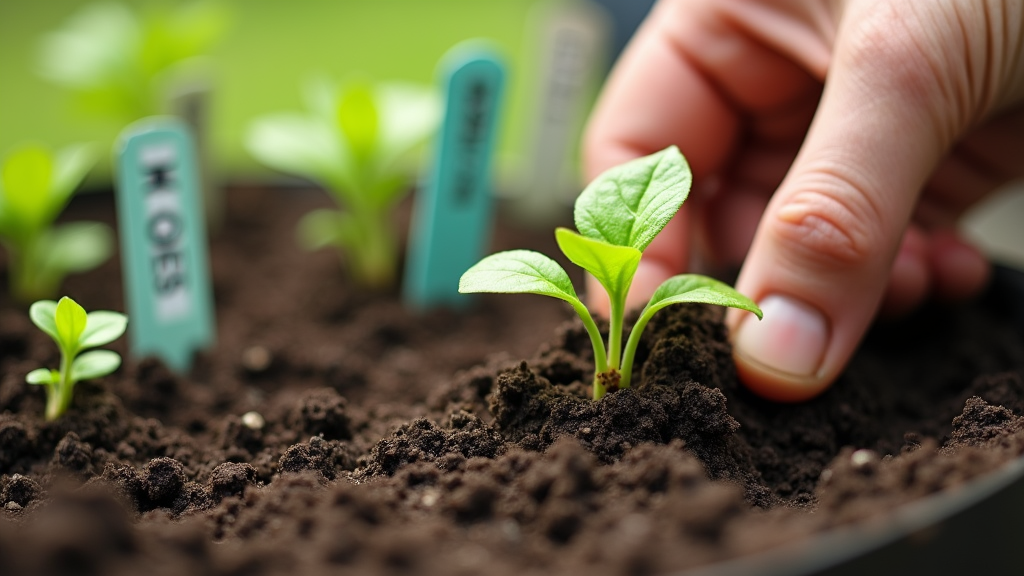
- Label Everything: You won’t remember which green shoot is which. Label your trays or pots to keep everything straight.
- Thin Carefully: Once seedlings have a couple of true leaves, snip the extras at the base instead of pulling. This avoids disturbing the roots of neighbors and keeps plants strong.
This is a simple seed sowing guide, but every plant is a little different, so always double-check your seed packet. Successful seed sowing means paying attention along the way, and the pay-off of healthy, strong plants is worth it.
Sowing Seeds: Direct Sowing versus Planting Seeds Indoors
Knowing when to direct sow in the garden versus start seeds indoors is super useful for getting the best results. Here’s how I decide each approach:
- Direct Sowing: Crops like carrots, beets, radishes, and beans do best when direct sown outside because of their sensitive taproots or dislike for being moved. Outdoor planting basics are all about waiting for warm soil and not rushing—cold ground slows everything down.
- Indoor Starting: Starting seeds indoors gives you an early jump on the season and puts you in control of conditions. Tomatoes, peppers, cabbage, and lots of flowers thrive with an indoor head-start under grow lights or in a bright window.
Some plants respond to day length (a “photoperiodic” reaction). For instance, onions need to be timed just right to avoid getting small bulbs. Check the seed packet for tips on the right timing in your area.
How to Transplant: Seedling Transplanting and the Transplanting Method
Transplanting is about moving young, started seedlings to their final growing spot. It’s a method that’s part of most sowing and transplanting routines. Here’s what I do when transplanting seedlings:
- Start with Healthy Seedlings: Transplant when the plant has two or three true leaves (not the first seed leaves). Roots should hold the soil together but not be circling and tangled—the goal is a solid root ball that isn’t constricted.
- Harden Seedlings Off: About a week before planting, set seedlings outdoors for a couple of hours in a sheltered spot, bringing them inside at night. Gradually increase outdoor time. This lets leaves toughen up and prevents shock.
- Pick the Right Timing: Plant on a cloudy day or late afternoon, so tender seedlings aren’t scorched by the midday sun. Wait until soil temps are comfortably warm—most summer crops like at least 50–60°F (10–16°C).
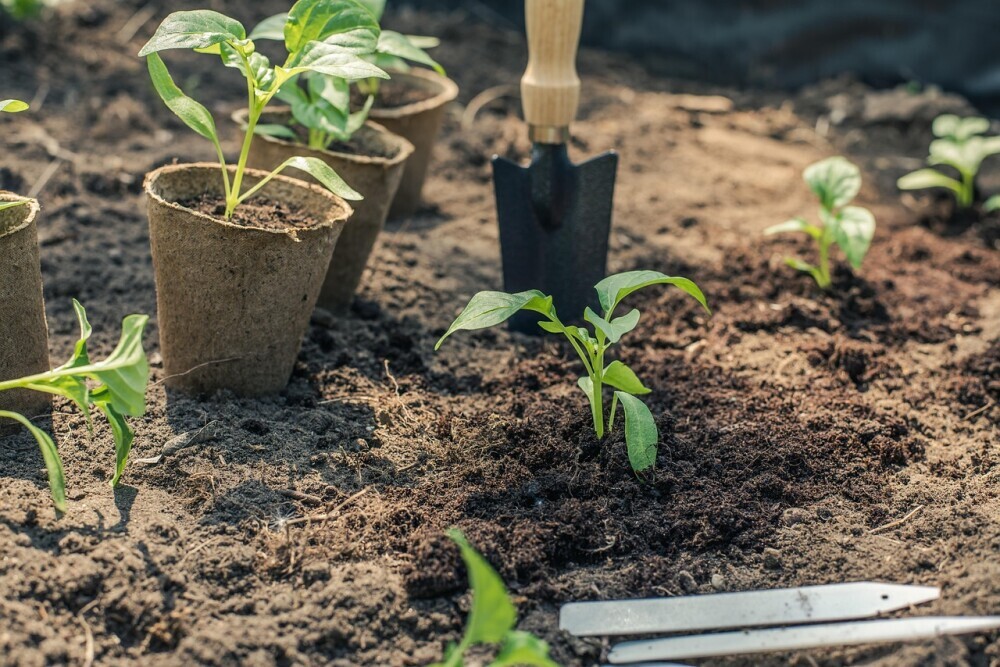
- Prepare the Soil: The soil should be moist and loose. Prep holes in advance and water each one before planting.
- Transplant Carefully: Handle only by the leaves, never the stem. For most crops, plant at the same depth as in their pot. For tomatoes, bury part of the stem for more root growth.
- Water In Well: After transplanting, water with weak (about quarter strength) liquid fertilizer high in phosphorus to encourage roots.
- Mulch and Shield: Mulch holds in moisture. Fragile seedlings can use row covers for protection if it’s windy or chilly the first few days.
This method works for most veggies and flowers—just be gentle, take your time, and you’ll see lasting results in your garden bed.
Common Questions About Transplanting versus Planting Seeds Directly
Understanding the real difference between direct sowing and transplanting makes planting decisions much simpler:
- Transplanting is moving established seedlings to a new spot. You get a head start, but there can be root disturbance.
- Direct Planting means sowing seeds where they’ll mature. There’s less root disturbance, but it usually takes longer for plants to get established.
Plants that really dislike being transplanted include those with sensitive taproots or that grow quickly. Think carrots, parsnips, beets, corn, and most root vegetables. Peas, beans, and many squash types prefer direct sowing as well, except for areas with very short growing seasons—biodegradable pots can trick fussy varieties into coping better with transplanting if needed.
More on Seed Sowing Guide: Temperature, Light, and Water
For seeds to sprout and thrive, they need the right conditions. The main points are:
- Temperature: Seed packets list temperature preferences. Tomatoes, peppers, and some flowers like it warm. Lettuce and spinach actually prefer it cooler.
- Light: Indoor seedlings need 12–16 hours of light per day. A bright window generally isn’t enough in winter—if possible, use LED or fluorescent grow lights placed close to the leaves.
- Moisture: Even, gentle moisture is key. Too much water drowns seeds, while too little halts growth. I mist the soil and never let the top layer dry out before seeds come up.
If you want to step up your results, a simple thermometer and spray bottle will help a lot. Stay attentive to the basics, and your seeds will take off.
Precision: Sowing Depth and Spacing
The rule that works for most seeds is to sow at about twice the seed’s diameter, but some really need their own thing. Lettuce and snapdragons are photoblastic—they need light—so don’t bury them at all. Peas and beans prefer deeper planting to hold moisture and boost germination.
Spacing is important too. Use a pencil or ruler to set even gaps when sowing. Crowded seedlings will need thinning, which can disturb roots. Good spacing lets every plant get light, air, and nutrients, and they handle transplanting a lot better.
Seedling Hardening: Getting Plants Ready for the Outdoors
Seedling hardening is the unsung hero for successful transplanting. It means gradually adjusting plants to outdoor life. This process helps leaves and stems toughen (the cuticle thickens, and stomata start working more efficiently), so they won’t wilt at the first sign of sunshine or gust of wind.
Start 7–10 days before you want to transplant. Put seedlings in shaded, sheltered spots for a few hours, increasing sun and wind exposure daily. Skipping this step almost guarantees setbacks like stunted growth or outright losses in your garden.
Transplant Readiness: Spotting the Right Moment
Root development signals transplant readiness. Check for these signs:
- You can spot two or three sets of true leaves above the soil.
- Tip the plant gently out of its pot—roots should hold the soil together but not be a tangled mess or circling tightly.
- Healthy roots look white, and there should be a good balance between the root mass and the plant on top (the root to shoot ratio).
Don’t let seedlings get rootbound. If they do, growth often stalls after transplanting, and recovering takes time.
Transplanting Techniques: Best Practices
Here are techniques I use for easy, successful seedling transplanting:
- Always handle by the leaves, as stems are very delicate and damage quickly.
- Water seedlings an hour before you move them so they slide out of pots neatly and the soil sticks together.
- Set seedlings at the same soil level as before, unless you’re planting tomatoes (deeper is better for them).
- Fill around transplants with loose soil and gently firm it down; leave no big air spaces to keep roots snug.
- Water right away after transplanting to settle the soil and connect roots to their new environment.
These simple transplanting practices protect your seedlings from shock and give them the best chance of settling in well.
Post-Transplant Care: Helping Seedlings Settle In
After transplanting, some easy steps help seedlings take off:
- Feed with a diluted starter fertilizer that’s high in phosphorus (like a 10-52-10 blend) at quarter strength—this gives new roots a good boost.
- Mulch lightly with chopped straw or leaf mold to lock in soil moisture and stop weeds before they get going.
- Keep watering consistently, especially in the first week—gentle showers, not big floods.
If seedlings look stressed, with wilting or yellow leaves, provide a bit of shade and stay patient; most will bounce back with a little care.
Common Problems and How to Troubleshoot
Everyone makes a mistake or two now and then. Here are my go-to fixes:
- Damping-Off: Tiny seedlings wiped out overnight? That’s a fungal problem. Always use sterile seedstarting mix, bottom water, and skip the overwatering. Sometimes a dusting of cinnamon on the soil helps, or watering with diluted chamomile tea as a mild antifungal.
- Poor Germination: Usually this means seeds are too old, buried too deep, or conditions are too cold. Double-check your planting instructions and try with fresh seed whenever you can.
- Transplant Shock: If seedlings look wilted or purple, give them temporary shade, keep watering, and be gentler with roots next time. With a bit of patience, most will recover.
Use clean tools, watch your seedlings closely, and you’ll have fewer problems. For important seeds, consider giving them an organic seed treatment or biocontrol before sowing for extra protection.
Frequently Asked Planting Questions
How do I plant a seed step by step if I’m just starting out?
Start with fresh seeds and sterile seedstarting mix. Moisten the mix, plant each seed at the depth the packet recommends, keep warm and well-lit, label your containers, mist the soil, thin seedlings as needed, and transplant when there are a few strong leaves.
What’s the transplanting method of sowing seeds?
This process starts seeds indoors or in a protected nursery area, nurtures seedlings until they’re strong, and then moves them to their final garden space when conditions are right outdoors.
What’s the real difference between transplanting and planting plants?
Transplanting means moving a young seedling from a pot or tray into the garden or another larger pot. Planting is putting seeds or plants in their final spot for the first time.
Which plants don’t like to be transplanted?
Roots crops with tender roots—carrots, beets, parsnips—plus corn, peas, beans, and most kinds of squash, cucumbers, or melons if they get their roots disturbed. It’s always best to direct sow these outdoors whenever possible for the healthiest growth.
My Conclusion: Sowing Smart, Transplanting with Care
Mastering the basics of seed sowing and transplanting doesn’t just set you up for a productive garden, it transforms the whole experience. With a little attention to timing, technique, and care, you’ll see stronger starts, smoother transitions, and more resilient plants all season long. Whether you’re coaxing flowers from seed trays or planting your first vegetable bed, these foundational skills help take the mystery out of gardening and replace it with confidence. Start simple, stay observant, and your garden will reward you with growth you can be proud of.

Sowing seeds and transplanting are truly the heart of any successful garden, and finding the right balance between the two can make all the difference in plant health and productivity. In my experience, starting with seeds offers a deeper connection to the entire growth cycle, while transplanting brings a level of control that helps ensure better outcomes, especially in unpredictable climates. The topic is incredibly relevant to both beginners and seasoned gardeners, as the choice between these methods often shapes the entire growing season. I find that combining both approaches strategically can maximize space and yield.
Thank you for sharing such thoughtful insights—you’re absolutely right. Sowing seeds and transplanting each bring distinct advantages, and understanding when and how to use both is key to a thriving garden.
Starting from seed does offer a rewarding connection to the entire growth cycle, and it opens up a wider selection of varieties that might not be available as transplants. It’s also more economical and gives gardeners the opportunity to time plantings more precisely.
On the other hand, transplanting is a powerful tool for managing short seasons or unpredictable weather, as you mentioned. It gives gardeners a head start and often leads to stronger, more resilient plants, especially for crops that are slow to germinate or sensitive in their early stages.
Strategically combining both methods—sowing directly for fast growers like radishes and greens, while transplanting long-season crops like tomatoes or peppers—can absolutely help optimize space, extend harvest windows, and boost overall productivity.
This kind of hybrid approach is exactly what I recommend to both new and experienced gardeners looking to make the most of their growing season. Thanks again for bringing attention to such an important and often overlooked aspect of garden planning!
Your Garden Guides
Hi Iris,
I just read your wonderful article on yourgardenguides(.)com about the basics of sowing seeds and transplanting seedlings. It was so informative and inspiring!
Your article covers everything from checking seed viability to hardening off seedlings before transplanting. It explains the importance of using the right growing medium, providing the proper temperature, light, and moisture conditions, and spacing plants correctly.
What I love most is how it breaks down the differences between direct sowing outdoors versus starting seeds indoors, and provides clear guidance on when to use each method. The tips on how to handle seedlings gently during transplanting to avoid shock were especially helpful.
Reading this makes me excited to get out in the garden and put these techniques into practice. I feel much more confident now in my ability to start plants from seed and nurture them through to maturity.
The writing style is engaging and easy to follow, with practical advice that any gardener can use. I appreciate how it addresses common problems like damping off and poor germination, and offers simple solutions.
It’s a fantastic resource for beginners and more experienced growers alike. Happy planting!
Eric
Hi Eric,
Thank you so much for your kind and thoughtful message.
I’m truly glad you found the article helpful and inspiring! It means a lot to hear that the information gave you a boost of confidence to dive into seed starting and transplanting. That’s exactly the goal of the piece—to make these foundational skills feel approachable and rewarding, no matter your experience level.
I’m especially pleased that the sections on handling seedlings and troubleshooting common issues like damping off resonated with you. Those early stages can be delicate, but with a little care and the right techniques, they’re incredibly rewarding.
Wishing you a successful and joyful gardening season ahead—may your seeds sprout strong and your transplants thrive! Feel free to reach out anytime with questions or updates on how things are growing.
Happy planting,
Iris ????
I love gardens. I have grown a few plants but no fruits or vegetables. I spent many hours in my grandpa Matas’ garden (lots of cucumbers, squashes, and carrots) and my grandma Cicchis’ garden (lots of lettuce, tomatoes, and garlic.) Reading this gives me incentive to plant something I can eat like tomatoes. MAC
I love gardens. I have grown a few plants but never any plants that bear fruits or vegetables. I do want to grow tomatoes and maybe garlic. I spent many hours in the garden in Colorado with my grandpa Mata. He grew mostly squashes, cucumbers, carrots, onions, and 2 apple trees. I also spent lots of time with my grandma Cicchi in her garden where she grew mostly lettuce, tomatoes, and the kind of squash that has orange, edible flowers. This article is clear and concise enough that I could actually follow it an get some tomatoes growing. Let us see how it turns out. MAC
Hi MAC,
Thank you for sharing such a heartfelt message.
What beautiful memories of gardening with your grandparents! It’s clear that those experiences left a lasting impression, and I’m so glad to hear you’re thinking about continuing that legacy by growing your own tomatoes and garlic.
Tomatoes are a wonderful place to start—they’re rewarding, relatively easy once established, and there’s just nothing like the taste of a homegrown one. Garlic is also a great choice and surprisingly low-maintenance, especially if you plant it in the fall for a summer harvest.
I’m thrilled the article gave you the confidence to give it a try. That’s exactly what it was written for, to help gardeners like you take the next step with clarity and support. I’d love to hear how things go as the season progresses. You’ve got this!
Warm wishes and happy growing,
Iris ????
This was such a practical and well-explained guide! I’ve always found sowing and transplanting a bit intimidating, but your step-by-step breakdown made it feel totally doable even for a hobby gardener like me. I especially appreciated the tips on seedling hardening and spotting transplant readiness, which I often overlook. Do you have any favorite plants that are surprisingly easy for beginners to grow using these techniques?
Hey,
I’m really glad the guide helped demystify sowing and transplanting for you, those first steps can definitely feel intimidating, but once you get the hang of them, they open up so many rewarding possibilities in the garden.
As for beginner-friendly plants, there are definitely a few favorites that respond really well to the techniques I mentioned. Leafy greens like lettuce, spinach, and kale are great starter crops—they germinate quickly, don’t mind a bit of crowding early on, and transplant easily. Zinnias and marigolds are excellent choices if you’re leaning toward flowers because they’re resilient, quick to bloom, and very forgiving. For vegetables, bush beans and zucchini are reliable and productive with minimal fuss, especially once seedlings are properly hardened off.
If you’re ever unsure whether something is ready to move, just look for sturdy stems and at least two sets of true leaves, that’s usually a solid signal. Feel free to reach out anytime if you’re deciding what to plant next!
Your Garden Guides
This was such a detailed and easy-to-follow guide. It really cleared up the confusion I had around transplanting and direct sowing. I especially liked the tips on seedling hardening and the reminder to handle only by the leaves, not the stems (something I’ve sadly learned the hard way). The way you broke down seed types and sowing depth was super helpful too. Do you have a favorite setup or tool you swear by for starting seeds indoors?
Hey Kavitha,
I’m really glad the guide helped clarify things for you, especially around transplanting and direct sowing. It’s always tough learning lessons the hard way (we’ve all snapped a stem or two!), but it’s great to hear that the seedling hardening and handling tips resonated.
As for starting seeds indoors, yes…I do have a few go-to tools and setups I rely on!
My favorite is a sturdy seed-starting tray with a clear humidity dome and bottom heat mat. The consistent warmth really boosts germination rates, especially for heat-loving crops like tomatoes and peppers. I also like using LED grow lights with an adjustable height, so I can keep the light close to the seedlings as they grow. It helps prevent leggy stems and promotes strong growth.
Let me know if you’d like a breakdown of my full indoor setup, I’d be happy to put that together in a post!
Your Garden Guides
This guide was incredibly helpful! I’ve always been a bit unsure about the best practices for sowing seeds and transplanting seedlings, but your step-by-step approach made it all so clear. I especially appreciated the tips on checking seed viability and the importance of labeling—simple steps that make a big difference. Your explanation of when to direct sow versus starting seeds indoors has given me a new perspective on planning my garden. Thanks for sharing your expertise in such an accessible way!
Hi Bob,
Thank you so much for your kind feedback! I’m really glad to hear the guide helped clarify things, sowing and transplanting can feel a bit technical at first, but with a few key habits (like checking seed viability and labeling!), it really does become second nature.
I’m especially happy the section on choosing between direct sowing and indoor starts resonated with you. That one decision can really shape how your garden grows, and thinking it through early makes for a much smoother season.
Wishing you a successful and enjoyable growing season, don’t hesitate to reach out if you ever have questions or want to share how things are going in your garden!
Your Garden Guides